Cloud Quick Start Guide
This guide shows you how to create and deploy an application to Platformatic Cloud.
Prerequisites
To follow along with this guide you'll need to have these things installed:
- Node.js >= v18.8.0 or >= v20.6.0
- npm v7 or later
- A code editor, for example Visual Studio Code
You will also need to have a GitHub account.
Log in to Platformatic Cloud
Go to the Platformatic Cloud website and click on the Continue with GitHub button. You'll be transferred to a GitHub page that asks you to Authorize Platformatic Cloud. To continue, click on the Authorize platformatic button.

On the Platformatic Cloud Service Agreements page, check the boxes and click the Continue button. You'll then be redirected to your Cloud Dashboard page.
Create a Cloud app
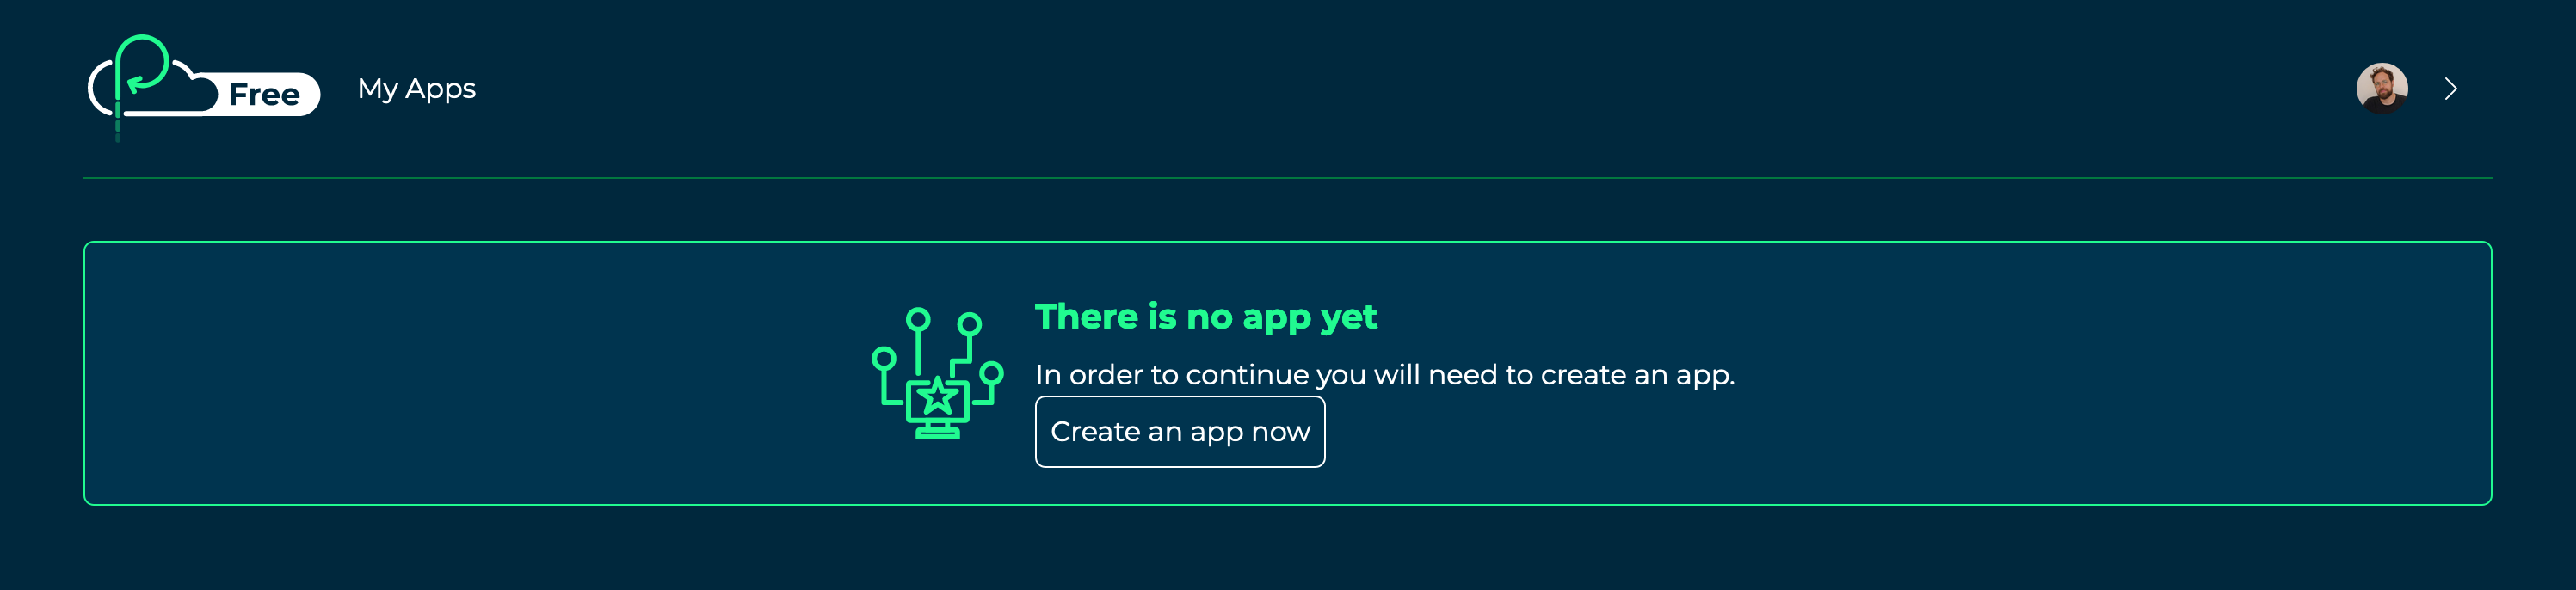
Click the Create an app now button on your Cloud Dashboard page.
Enter quick-start-app as your application name. Click the Create Application button.
Create a static app workspace
Enter production as the name for your workspace. Then click on the Create Workspace button.
On the next page you'll see the Workspace ID and API key for your app workspace. Copy them and store them somewhere secure for future reference, for example in a password manager app. The API key will be used to deploy your app to the workspace that you've just created.
Click on the Back to dashboard button.
Create a dynamic app workspace
On your Cloud Dashboard, click on your app, then click on Create Workspace in the Workspaces sidebar.
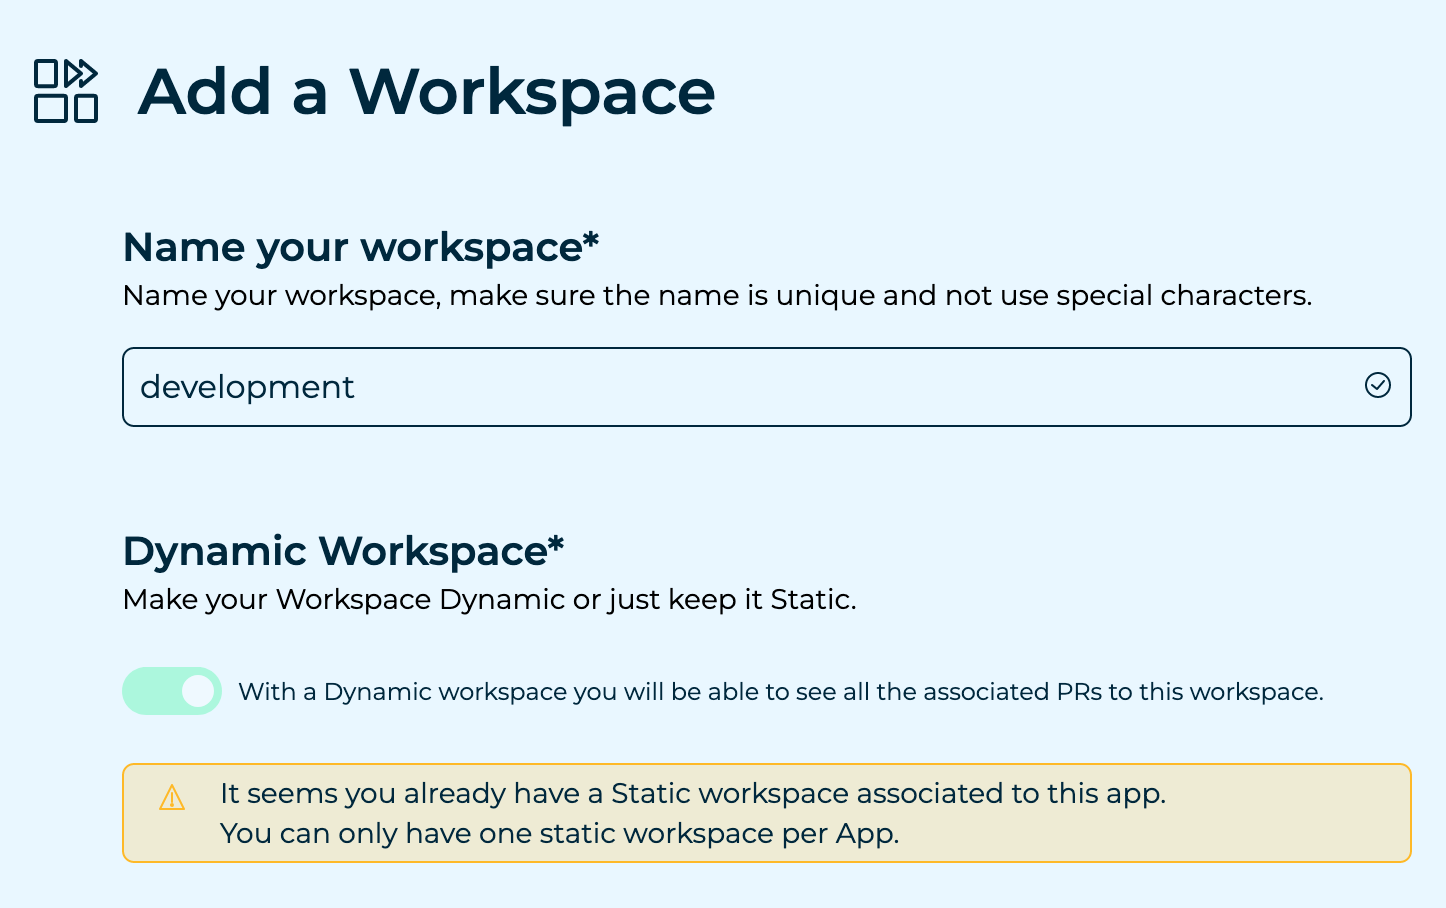
The Dynamic Workspace option will be automatically enabled as you have already created a static workspace. Dynamic workspaces can be used to deploy preview applications for GitHub pull requests.
Enter development as the name for your workspace, then click on the Create Workspace button.
Copy the Workspace ID and API key and store them somewhere secure.
Create a GitHub repository
Go to the Create a new repository page on GitHub.
Enter quick-start-app as the Repository name for your new repository.
Click on the Add a README file checkbox and click the Create repository
button.
Add the workspace API keys as repository secrets
Go to the Settings tab on your app's GitHub repository. Click into the Secrets and variables > Actions section and add the following secrets:
| Name | Secret |
|---|---|
PLATFORMATIC_STATIC_WORKSPACE_ID | Your app's static workspace ID |
PLATFORMATIC_STATIC_WORKSPACE_API_KEY | Your app's static workspace API key |
PLATFORMATIC_DYNAMIC_WORKSPACE_ID | Your app's dynamic workspace ID |
PLATFORMATIC_DYNAMIC_WORKSPACE_API_KEY | Your app's dynamic workspace API key |
Click on the New repository secret button to add a secret.
You can also use the GitHub CLI to set secrets on your GitHub repository, for example:
gh secret set \
  --app actions \
  --env-file <FILENAME_OF_ENV_FILE_WITH_SECRETS> \
  --repos <YOUR_GITHUB_USERNAME>/<REPO_NAME>
Create a new Platformatic app
In your terminal, use Git to clone your repository from GitHub. For example:
git clone git@github.com:username/quick-start-app.git
See the GitHub documentation for help with Cloning a repository.
Now change in to the project directory:
cd quick-start-app
Now run this command to start the Platformatic creator wizard:
- npm
- yarn
- pnpm
npm create platformatic@latest
yarn create platformatic
pnpm create platformatic@latest
This interactive command-line tool will ask you some questions about how you'd like to set up your new Platformatic app. For this guide, select these options:
- Which kind of project do you want to create?     => DB
- Where would you like to create your project?     => .
- Do you want to create default migrations?        => yes
- Do you want to create a plugin?                  => yes
- Do you want to use TypeScript?                   => no
- Do you want to overwrite the existing README.md? => yes
- Do you want to run npm install?                  => yes (this can take a while)
- Do you want to apply the migrations?             => yes
- Do you want to generate types?                   => yes
- Do you want to create the github action to deploy this application to Platformatic Cloud dynamic workspace? => yes
- Do you want to create the github action to deploy this application to Platformatic Cloud static workspace? => yes
Copy and paste your dynamic and static workspace IDs when prompted by the creator wizard.
Once the wizard is complete, you'll have a Platformatic app project in the
quick-start-app directory, with example migration files and a plugin script.
Deploy the app
In your project directory, commit your application with Git:
git add .

git commit -m "Add Platformatic app"
Now push your changes up to GitHub:
git push origin main
On the GitHub repository page in your browser click on the Actions tab. You should now see the Platformatic Cloud deployment workflow running.
Test the deployed app
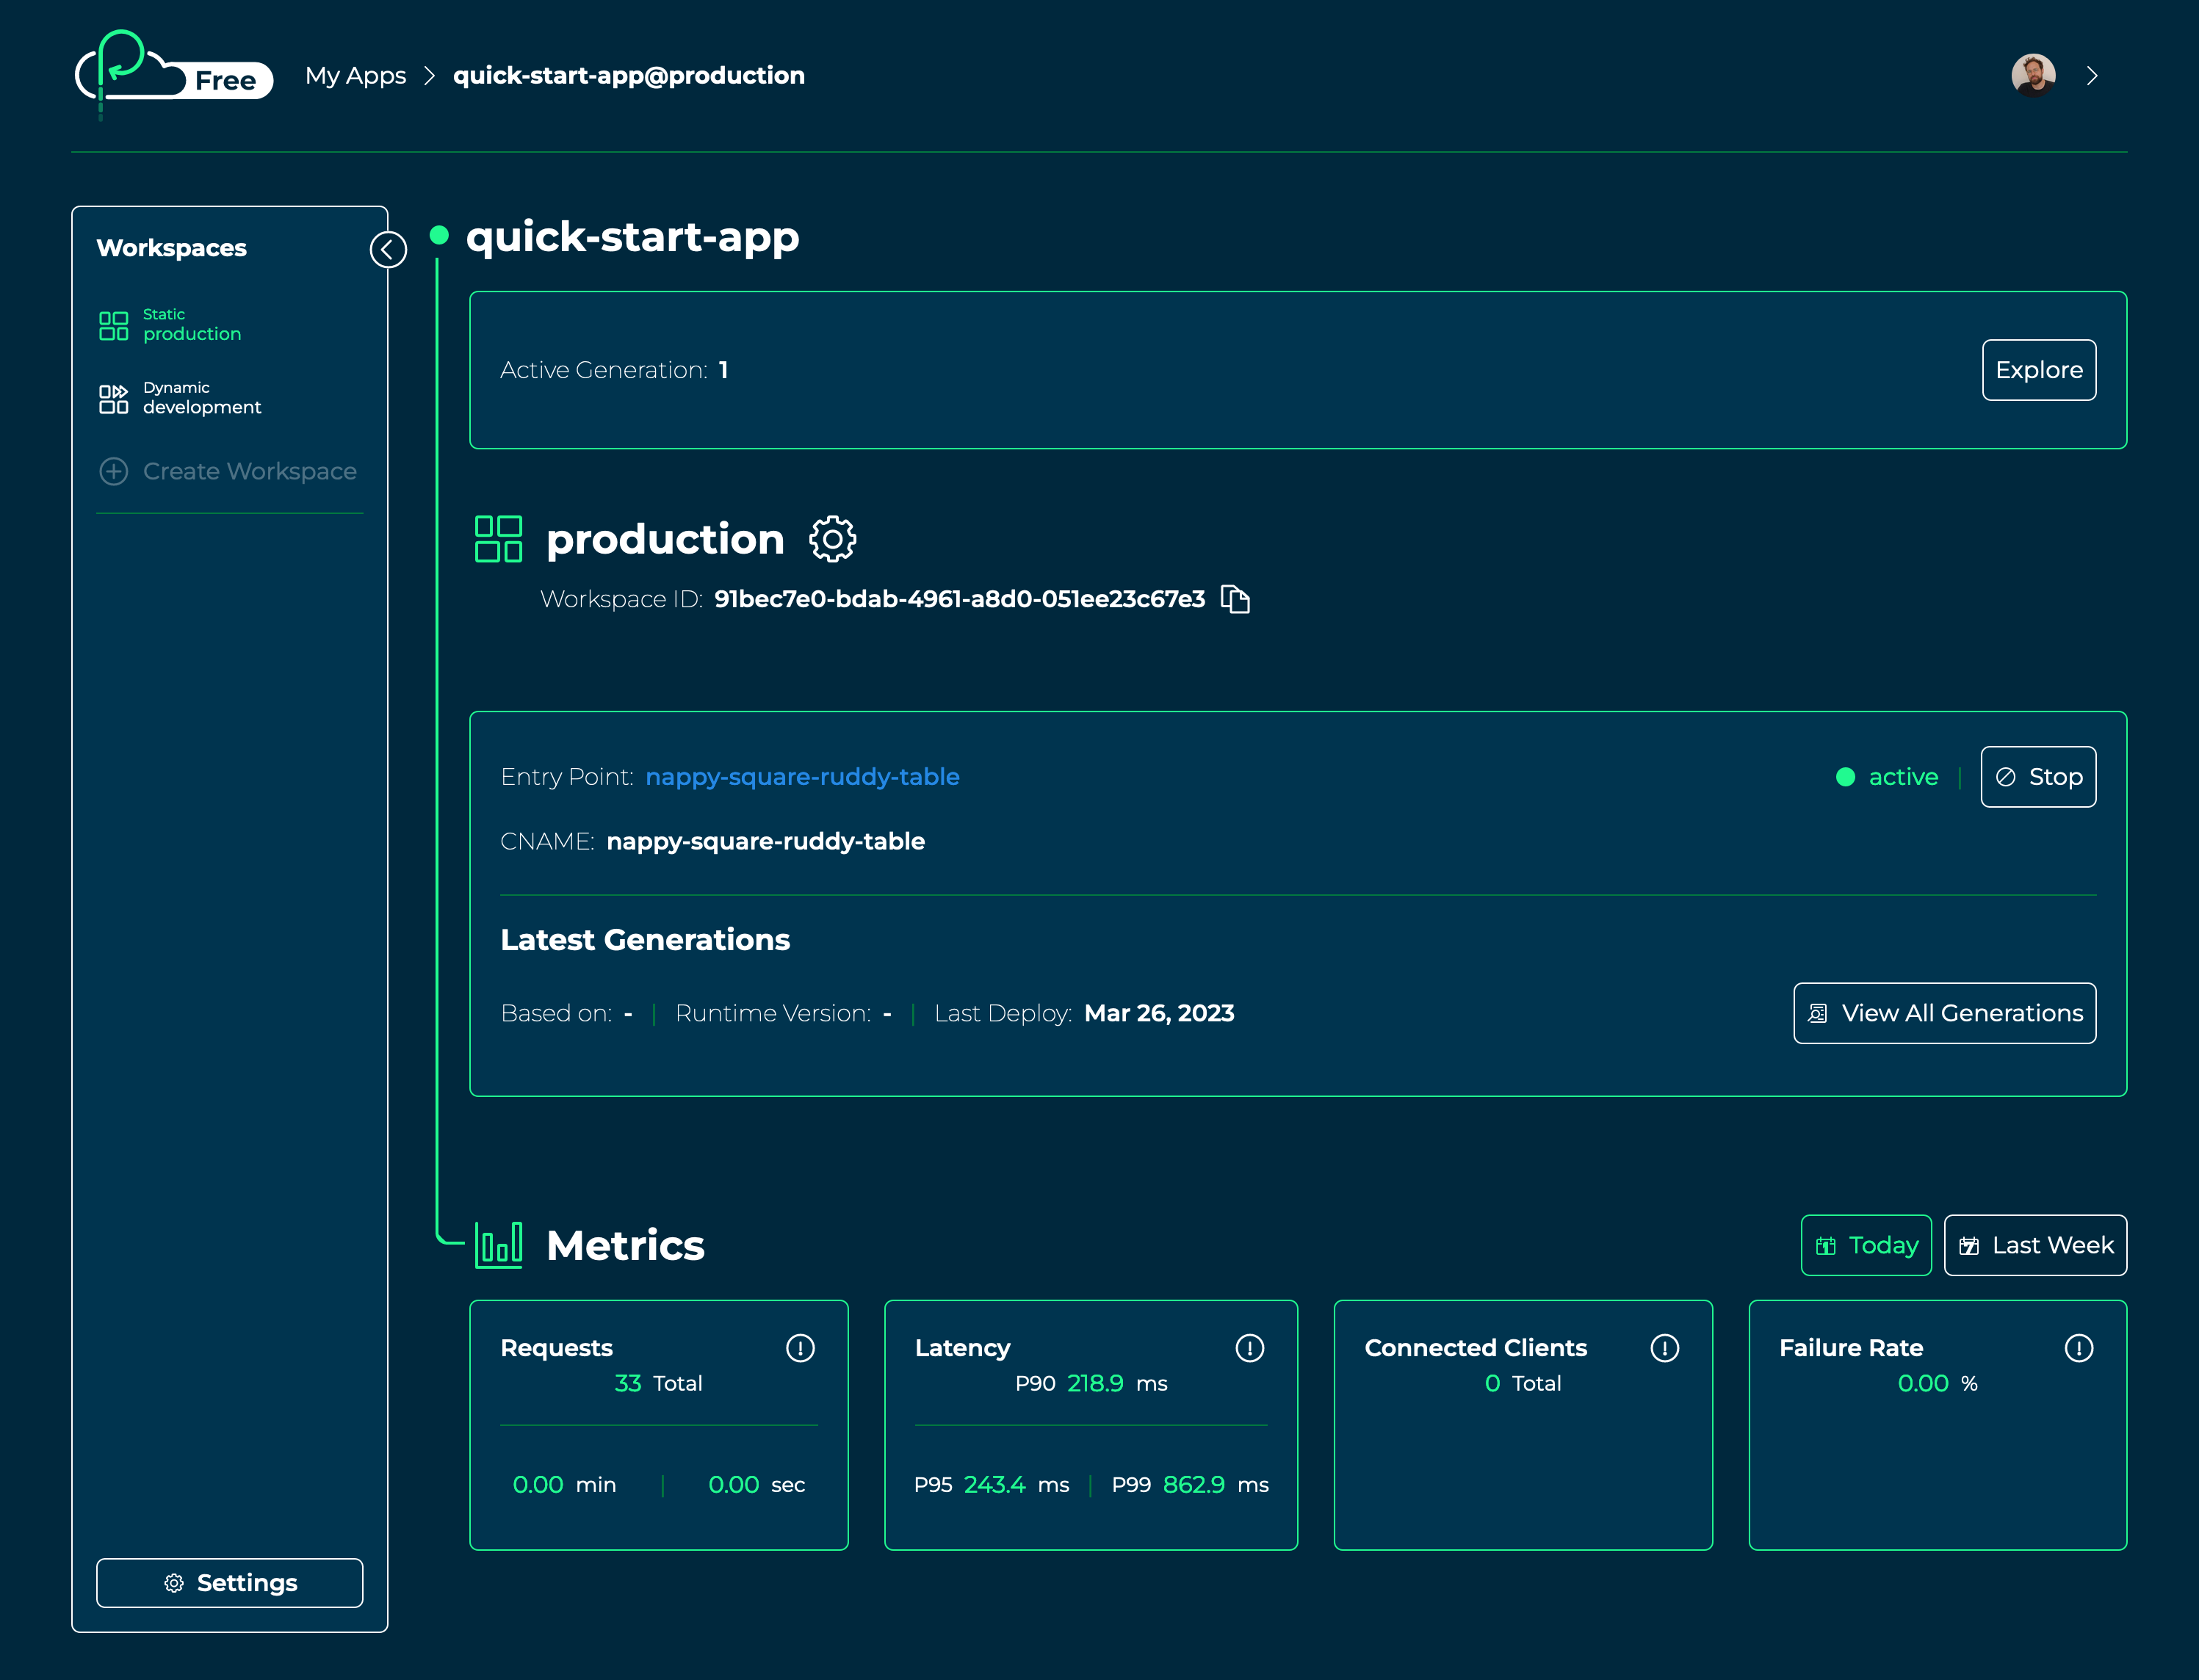
Once the GitHub Actions deployment workflow has completed, go to the production workspace
for your app in Platformatic Cloud. Click on the link for the Entry Point. You should now
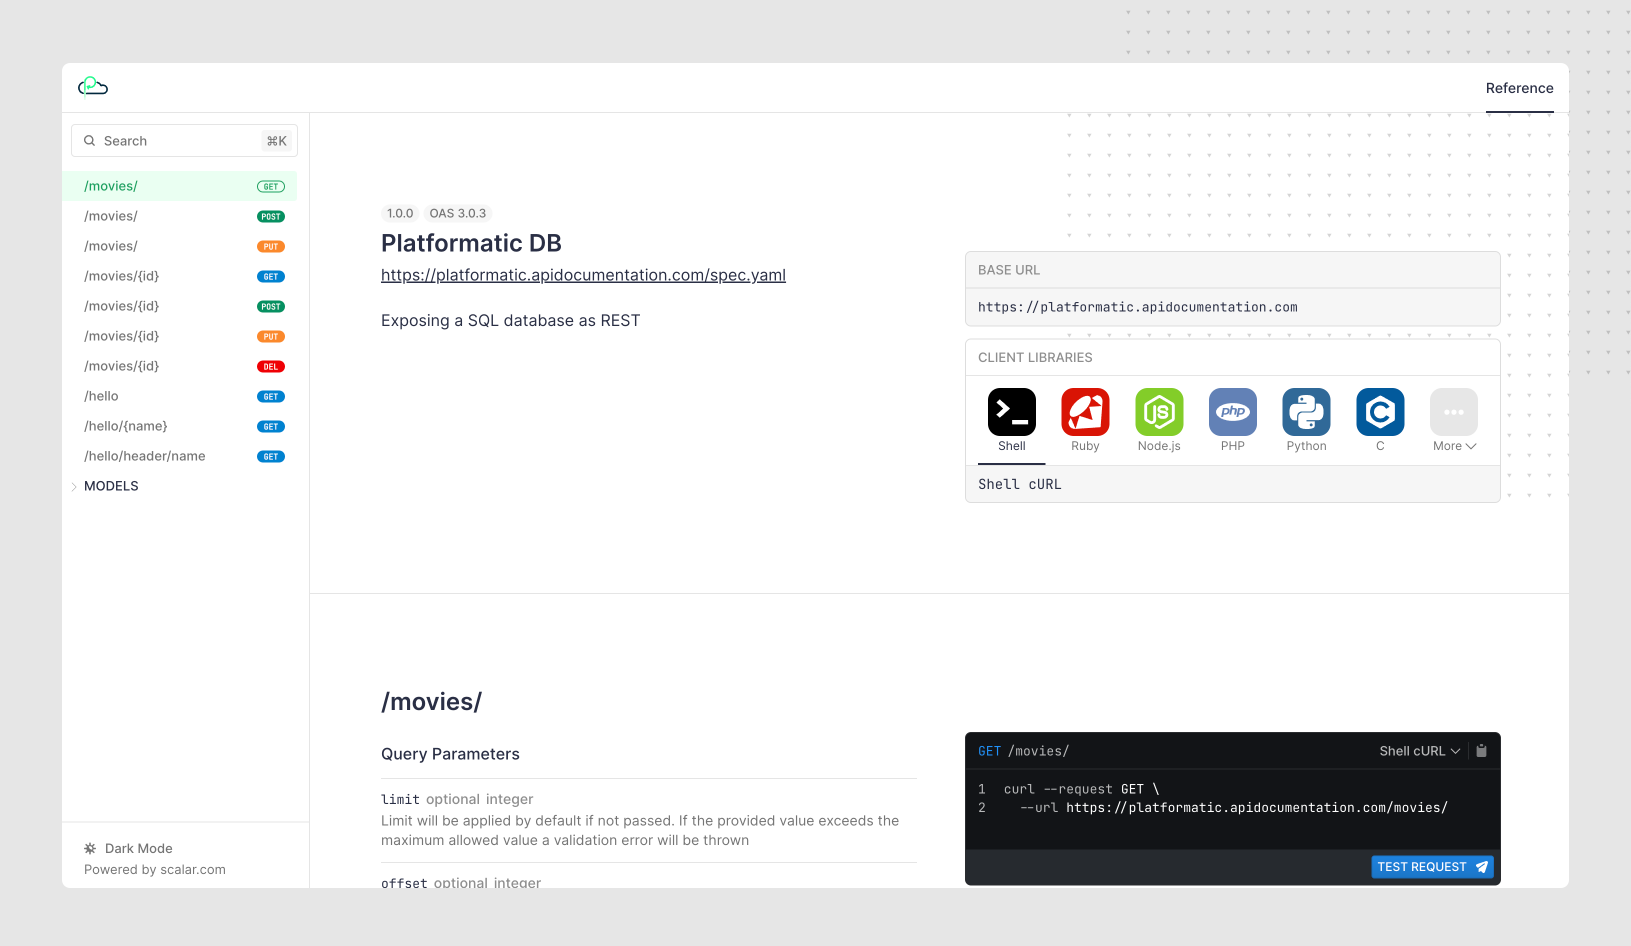
see the Platformatic DB app home page.
Click on the OpenAPI Documentation link to try out your app's REST API using Scalar.
Preview pull request changes
When a pull request is opened on your project's GitHub repository, a preview app will automatically be deployed to your app's dynamic workspace.
To see a preview app in action, create a new Git branch:
git checkout -b add-hello-endpoint
Then open up your app's plugin.js file in your code editor. Add the following code inside
the existing empty function:
app.get('/hello', async function(request, reply) {
  return { hello: 'from Platformatic Cloud' }
})
Save the changes, then commit and push them up to GitHub:
git add plugin.js

git commit -m "Add hello endpoint"

git push -u origin add-hello-endpoint
Now create a pull request for your changes on GitHub. At the bottom of the pull request page you'll see that a deployment has been triggered to your app's dynamic workspace.
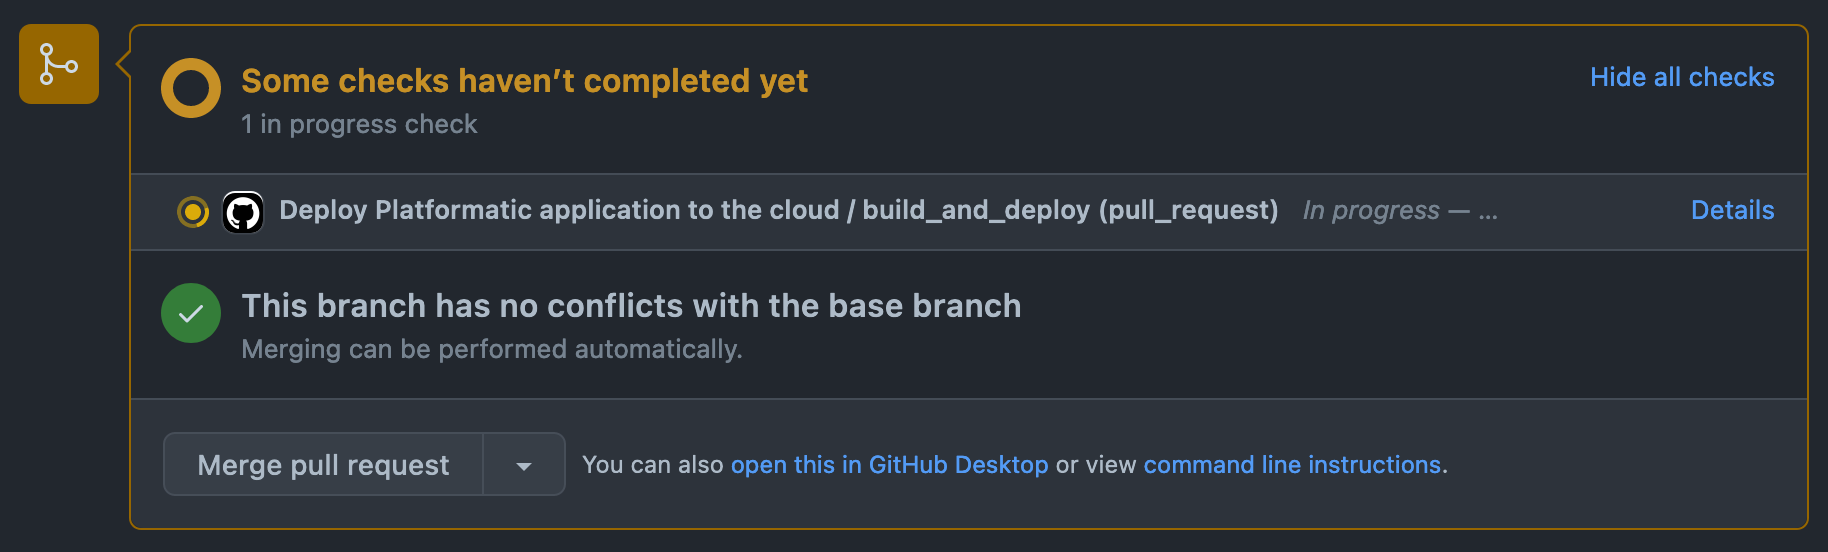
Once the deployment has completed, a comment will appear on your pull request with a link to the preview app.
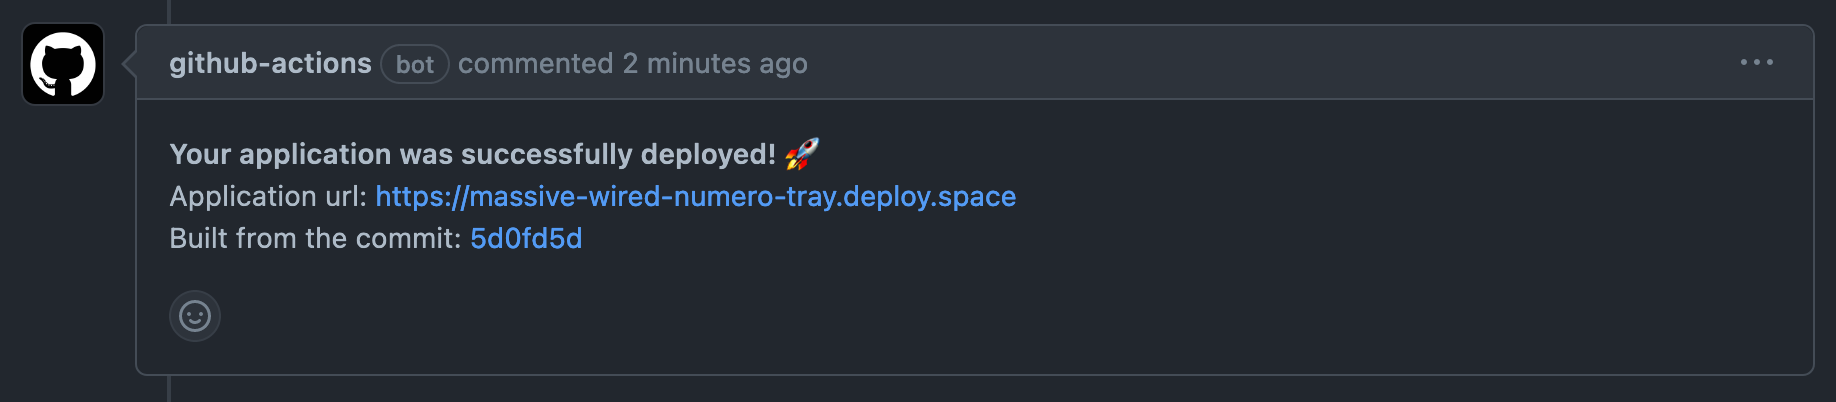
Click on the Application URL link. If you add /hello on to the URL,
you should receive a response from the endpoint that you just added to
your application.

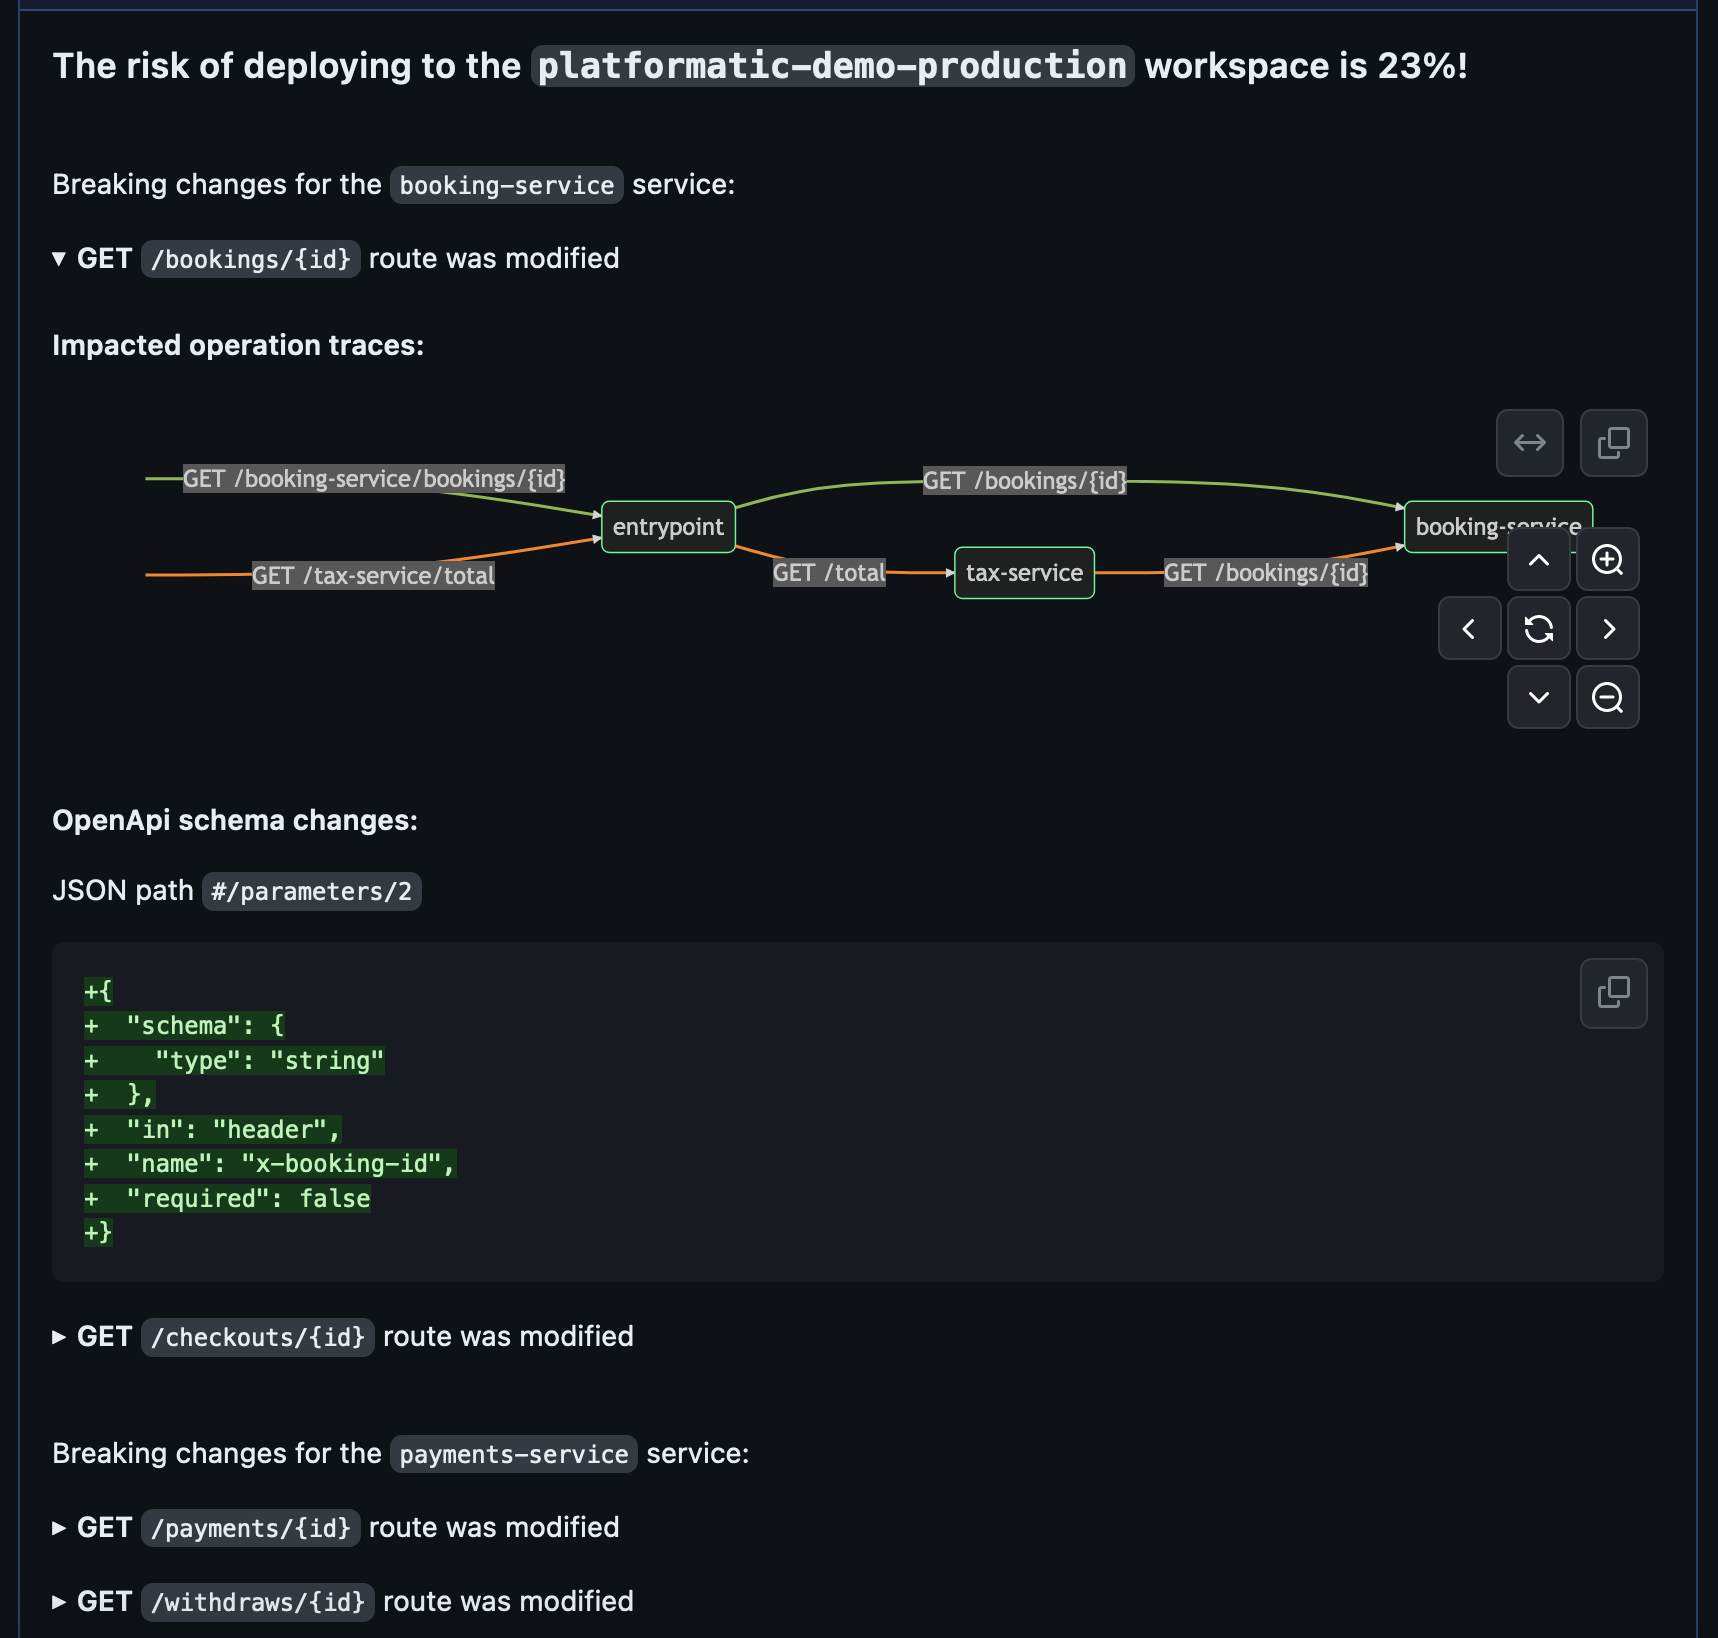
Calculate the risk of a pull request
You can use the Platformatic Cloud API to calculate the risk of a pull request being merged into your production environment. The risk score is calculated based on the potential breaking changes in the application API. For example, if a pull request adds a new endpoint, it will not be considered a breaking change and will not increase the risk score. However, if a pull request changes the open API specification for an existing endpoint, it will be considered a breaking change and will increase the risk score.
To calculate the risk score for a pull request, you can use the Platformatic Risk Calculation GitHub Action. If you are using the latest version of the Platformatic app creator, this action will already be set up for you. If not, here is an example of how to set it up.
When a Platformatic Deploy Action is finished, the Platformatic Risk Calculation Action will be triggered. The risk score will be calculated for each production workspace that exists for your app. Besides the risk score, the action will also return a list of breaking changes that were detected in the pull request and show the graph of services that are affected by the changes.